1. I opened the file in Photoshop CS4
2. Adjusted Levels and Gamma:
Image>Adjustments>Levels and adjusted the input levels to 10 | 1.17 | 112
3. Adjusted the Curves:
Image> Adjustments> Curves and selected the “lighter” Preset.
4. Changed the image size:
Image>Image Size> Adjusted size 640x423 at 72 dpi.
5. Save as ai_g223_w2_chopsticks2.psd
6. Then saved again as .jpg quality 8

Before

After
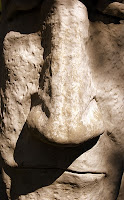
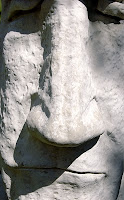
FACE IMAGE:
1. I opened the file Photoshop CS4
2. Adjusted Levels and Gamma:
Image>Adjustments>Levels and adjusted the input levels to 4 | 1.77 | 251
3. Adjusted the Curves to remove warm colorcast:
Image> Adjustments> Curves, select the gray eyedropper and select image in a gray area to remove the colorcast.
4. Changed the image size:
Image>Image Size> Adjusted size 397x640 at 72 dpi.
5. Save as ai_g223_w2_face2.psd
6. Then saved again as .jpg quality 8


Before--------------------------> After
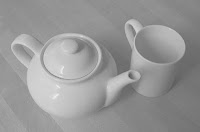
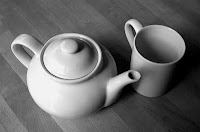
TEA IMAGE:
1. I opened the file in Photoshop CS4
2. Adjusted Levels and Gamma:
Image>Adjustments>Levels and adjusted the input levels to 110 | 1.00 | 206
3. Adjusted the Curves to remove warm colorcast:
Image> Adjustments> Curves, and moved the top point slightly changing the output to 242.
4. Changed the image size:
Image>Image Size> Adjusted size 640x421 at 72 dpi.
5. Save as ai_g223_w2_teacups2.psd
6. Then saved again as .jpg quality 8

BEFORE

AFTER
No comments:
Post a Comment